So, the first thing I need to say is that I did not find this Pinterest treasure on my own… A dear friend found it and shared it with me. She jokingly asked, “So, do you think you could build something like this for your cabin by the end of the summer?”
I gave her an LOL and showed the picture to my husband and told him what the friend had said. We both kind of chuckled and then he looked a little closer at the picture.
He says, “You know, I have a bunch of lumber in the shed that would work for this…” We went digging in the shed and found more than enough green-treated pieces that were 6” x 10” and 12 feet long.
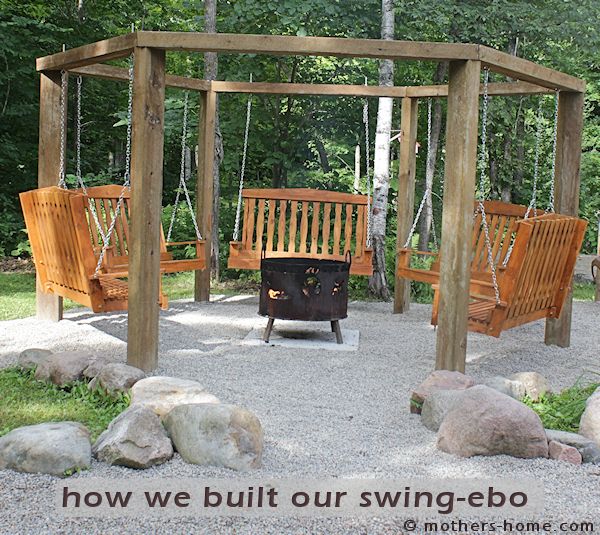
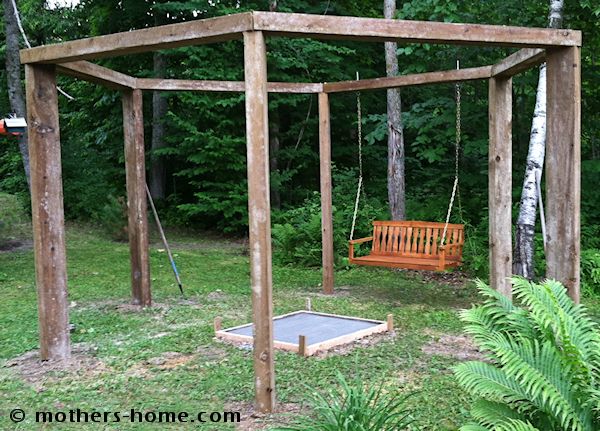
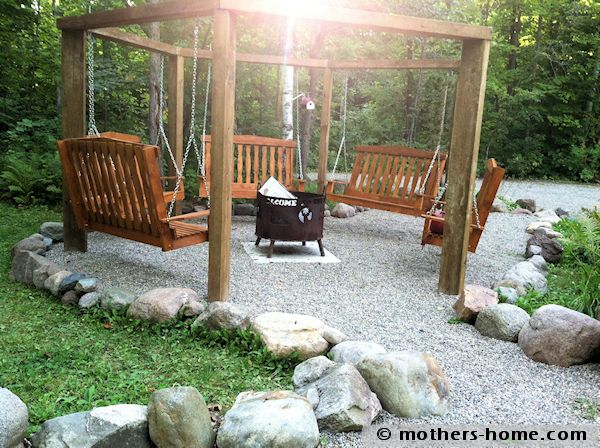
That is how our fire pit swing gazebo, or as I have dubbed it “swingebo”, was born!
We started out making the hexagon. That alone was quite the adventure! We needed each post in the hexagon to be 7 feet apart (to accommodate 5 foot swings). My husband found a video on YouTube he decided to follow and when we were done laying it out as the video explained, it was cockeyed :\. We had to take it out and start all over again.
He swore he knew exactly how to make one that would have the posts set 6 feet apart so we plotted out a hexagon using that configuration. We were happy with the shape but not the size so we carefully enlarged the hexagon to get the 7 foot space between posts. We used a lot of string and quite a few stakes, but it worked great.
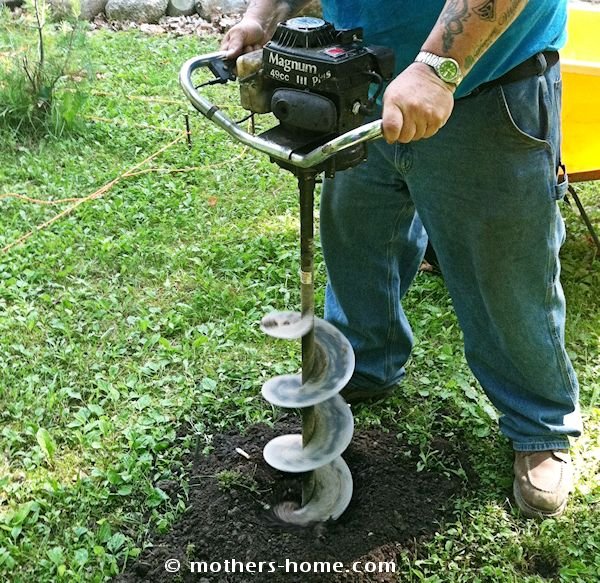
With the hexagon staked out, it was time to dig the holes. It was perfect that our boards were 12 feet long because our holes needed to be about 4 feet deep to get them in below the frost level (in hopes that when the ground freezes the posts don’t get pushed up). The digging went a lot faster than I thought it would because my husband used an old auger.
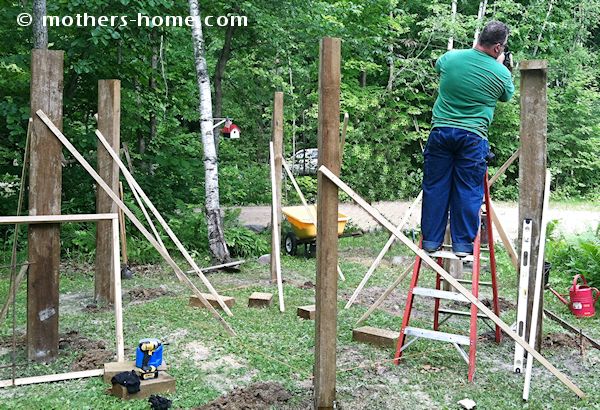
Once the holes were drilled we set the posts into the holes and set them in place using concrete that all you need to do is pour the bag into the hole and then pour in the water. We allowed the concrete to set completely and then my husband used a chain saw to cut off the tops of the posts so that they were all the same height.
To accomplish this, he measured one to 8-feet and cut it using a chain saw. We then use a 2’ x 4’ and a level to mark lines on the top of all of the other posts so he could cut them all to the same height.
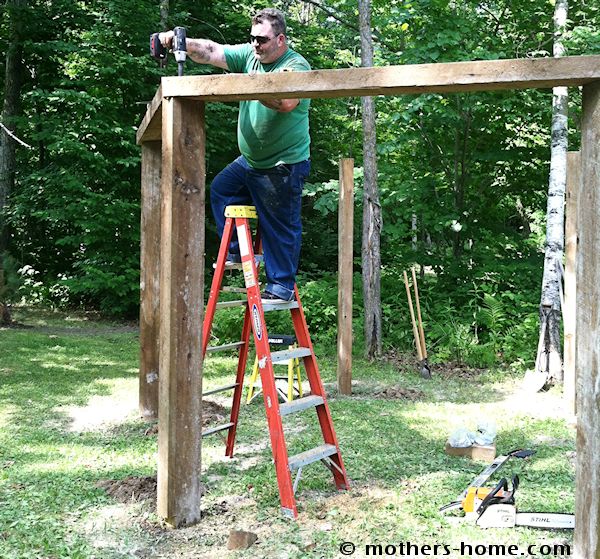
We used the same 6” x 10” x 12’ boards to go around the top of the hexagon. We laid the first one in place and my husband cut it to size using the chain saw. He cut each end at a 45 degree angle and screwed them in place. For each of the next 5 boards, we set them in place and marked off where they needed to be cut. My husband then cut each one and screwed them in place.
With all of those boards in place, the framework for our swingebo was complete (my husband didn’t want to do the cross-bracing… We will see how long that lasts for!)
We poured a cement base to hold out fire pit. We built a frame and placed it in the center of the hexagon. Pours some cement to make a base and let it dry.
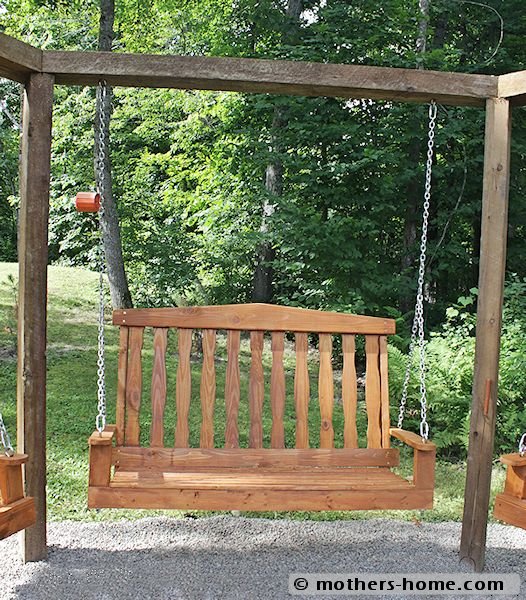
We found a 4-foot wide swing at our local home improvement store (the 5-foot ones had to be special ordered) just to try it out. I suppose we could have gotten one from Amazon, like this one: 5-Foot wide swing (affiliate link). While it was nice to be able to see a swing hung up, we actually didn’t end up using it.
My husband enjoys wood working and did not think the quality of the swing we found was worth the $60 price tag. The swings we have now (and the one pictured above) were made by him for about the same amount of money. They are twice as big as the purchased ones and a lot more durable. While he did not write down the plans for this swing (other than rough notes), you can find plans online like this one: U-Bild 897 2 U-Bild 2 Porch Swing Project Plan (affiliate link).
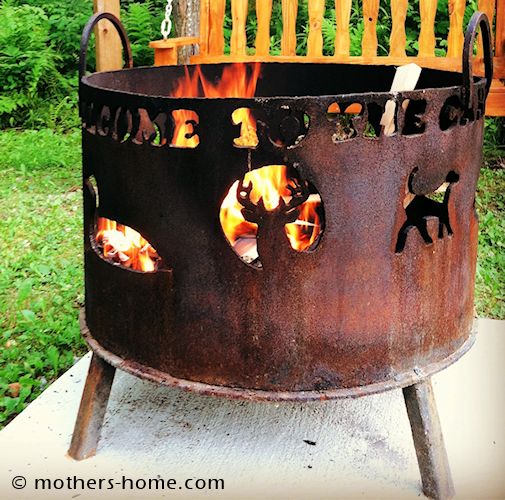
My husband also made this fire pit. The ring was cut from a caisson piling. He welded a metal plate to the bottom and drilled holes in it so the fire could breathe. He also welded legs onto it. He had a lot of fun making the shapes on the side playing with a plasma cutter.
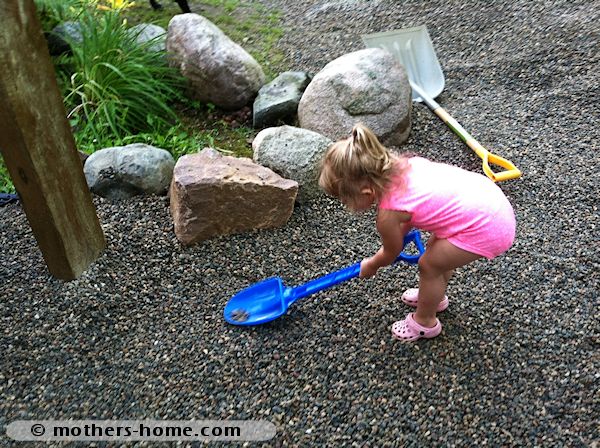
All that was needed to finish our swing set fire pit now was the gravel. First I sprayed all the weeds and grass around the area with Round-Up. When that was dry, I laid down black plastic everywhere we wanted the rock. Luckily we had lots of adorable help when it came to spreading the rock.
I was wrong… There was one last thing we needed to feel like our swingebo was complete: more large rocks. We already had the large rocks lining the driveway. We use a few of those when we had to move them to make the path into the fire pit area. We spent one weekend rock hunting at the cabin and hit the jackpot so now all of the pebbles are bordered by larger rocks.
We both love the way this turned out and I love the amazing sunspot in this final picture I took. I like to think of it as grandma and grandpa showing how much they like it also!
Disclosure: As noted above, this post contains affiliate links. See my disclosure policy for details.


Love the whole thing. Beautifully done, your husband is very good at building stuff.
hello, i would love to have a crack at this, do you have the youtube video link at all?
Thanking you
Kynan
“My husband found a video on youtube he decided to follow and when we were done laying it out as the video explained, it was cockeyed :\. We had to take it out and start all over again.” only saw the first part of this, oh right ok 🙂
I would just search the internet for “how to lay out or draw a hexagon and fin something that makes sense to you. The video method didn’t work for us simply because it didn’t make sense to my hubby. He went to a method he understood (even though we had to adjust the size after we laid it out) and it worked well.
Its very nice but it is a hexagon.
Thanks Jan, and yes… It is a hexagon…
Do you know an approximate cost?
Hi Nora, So sorry I don’t know an approximate cost… The most expensive thing would be the wood and we already had all of that! We just needed to buy the hardware and the cement.
I love the swing-ebo. Could you please email me the exact board measurements for this. I can’t figure
out the size of the post by looking at them. I have my holes laid out to dig but need sizes. This would
be greatly appreciated. Thanks you, Kathy Shepard
Hi Kathy, Good luck with your venture! As I state in the post, the boards we used were 6″ x 10″ x 12’…
This project so inspired my step daughter to persuade me to build one,that I did…..I used an 8 foot. radius to accomadate a 16 foot diameter…I used a “compass ” to draw out a hexagon on paper and used the same distance of the “drawn” circle from the center of circle to the “edge of circle.. I then picked a spot on the circle to make a “mark..then I lined up the new spot on the circle with the “Center of the circle and drew a straight line to establish a 2nd spot on the circle…3 spots now…one in the center and 2 on either side of the center directly in a straight line of each other..I took the :”compass” or “Dividers” without changing the distance of the setting and placed the “sticky” end of the Compass ,placed it on one of the points on the circle and “scribed ” an “arch” and marked where the pencil marks from the “arch” intercepted the circle top and bottom of circle on one side then did the same on the other side…I now had 3 points on either side of the circle….”6″ altogether,,,…Hence …,,,a Hexagon…did the same with an 8 ft.length of string and a can of white paint to do the same priciple outside when our porch swing fire pit now resides…hope this isn’t too cofusing
Thanks for sharing your experience Tony!
This is beautiful!! I know that your first swing was 4ft (but you wanted 5 ft). When your husband bad the new swings, did you end up going with 5ft or 4ft swings?
Thank you so much!
He built the swings so they were closer to 5 feet! 🙂
Bravo!! What a huge undertaking and beautiful result. Pinned. Love it! Congrats on finishing such a grand project.
Mother Sherri,
I am in Love with your fire Pit Swings. My Husband and sons already do not know what to do with all my projects. They are sure in for a surprise now.
Great Job!
Karen Marie
Dragonfly & Lily Pads
This is amazing and I can’t wait to show my husband. We have an area cleared off where we were putting a fire pit, but this is so much nicer! Thanks for sharing at Mix it up Monday 🙂
I’ve seen this on pinterest 😉 Y’all did a GREAT job building it and adorning it! Love it and wish I could have one too. Enjoy!
Thanks for sharing!
I saw this on pinterest also and pinned it right away! You guys did a super fantastic job! I love the firepit and the rocks around the perimeter is a perfect finishing touch. Lovely, just lovely. If I bring some chocolate, marshmallows and graham crackers, can I sit on your swing? 🙂
Sure thing Vickie… As long as you share! 🙂
This is great! I could see this in a backyard with some kind of shade for the roof for the summer time and the fire pit for winter. Good work.
Your “Swingbo” is AMAZING! I want one! Pinning to remember 🙂
Kristy @ 3 Peppers Recipes – Crafts, Cooking & Color
This is just about the coolest outdoor project I have ever seen! I would love to have one of these…if I had a lake house…or shade… Anyway, bravo! You and your hubby did a great job! I would love to have you share this with my readers at my Creative Ways Link Party that just went live tonight!. Hope to see you and your swingebo at the party!
Blessings,
Nici
I want one!! It looks so great! =)
Come link up with me today!
http://thediaryofarealhousewife.blogspot.com
LOVE your swngebo! Thanks for posting at Share it Sunday!!
That’s marvelous! I will not envy my blog neighbor’s Swingebo. I will not envy my blog neighbor’s Swingebo. I will not envy my blog neighbor’s Swingebo. Neighbor’s Swingebo. I will not envy my blog neighbor’s Swingebo. Grin!
Pingback: DIY Sunday Showcase ... 7/19 - View From The Fridge | View From The Fridge
Pingback: Share it Sunday {37} - denise designed
This is by far THE BEST tutorial I have seen for this project. And it’s called a Swing-zebo? AWESOME! Great job & thanks so much for sharing at the Sunday Showcase! =) Pin’ing & sharing!
I just absolutely love this! I want now and I’m sure I would spend my days and nights there reading.
Simply amazing! I love everything about it! Seriously awesome!
Pingback: Treasure Box Tuesday 29 - Memories By The Mile
I loved this project so much I’m featuring it at my Creative Ways Link Party tonight. Thanks so much for sharing it with us! Hope to see you again at tonight’s party!
Blessings,
Nici
Love it! I say you need some pillows/cushions now.
How can I may a single swing hanging like this? Help!
I am a wanna be carpenter.
Actually, laying out the design was the hard part… Would be a lot easier only using two posts to hold a single swing.
I LOVE this!! I saw the same idea on Pinterest and even shared it on my blog’s FB page. I love that you make it and that your husband was like… we totally have the supplies for this when you showed him the pic and that your friend was joking. I would SOOO love to do this some day in my backyard.
wow! truly awesome. enjoy-i’m sure you do!
b
The swing-zebo is beautiful! Does your husband think one can be built using 6″ x 6″ x 12′
Thank You,
Hi Sue,
Actually, the original one I found on Pinterest was made using 6″ x 6″ x 10’s so yours should work fine with a bit of shortening! 🙂
I am building a hex with 1 section offset by 14 feet to have a smoker and grill under it, for cooking and relaxing. going to put roof over the grill area in morning.. Mine is 9 and half feet between post, so making large swings and a pallet bed. My mind is wondering as to how to make each area different.