


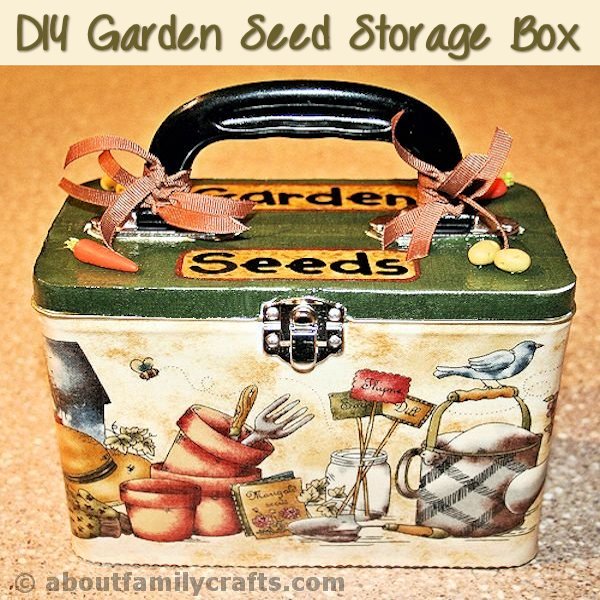
I am usually itching to get out in my garden even before all of the snow is melted, and this year is no different. On a recent trip to the store I found myself with more than a dozen packets of vegetable and flower seeds in my cart. The only problem with this is that when I got home, I had to figure out where to put my seed packets for a month while I wait for the soil temperature to rise.
As I often do, I solved this problem in my craft room! I am addicted to buying plain containers… Rarely do I leave the craft store without a fun-shaped paper mache container, a clear plastic tube, or a plain, white tin box in my cart. I decided one of those plain, white tin boxes would fit the bill perfectly.
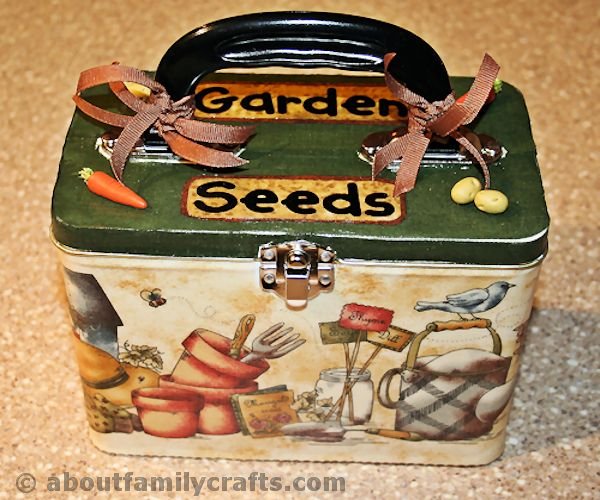
I paired the tin box with some garden themed fabric and I was so happy with the results. Don’t worry if you can’t find the exact tin box I have, you can even use a shoe box. What do you think?
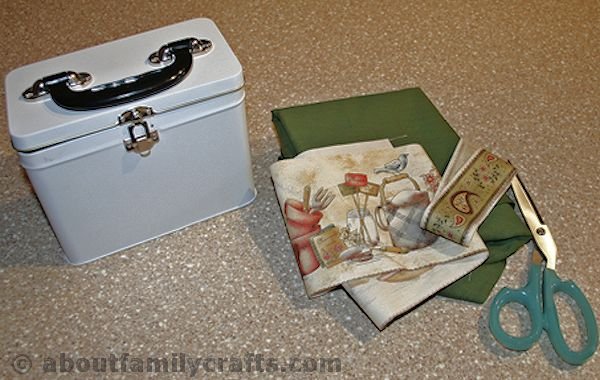
Supplies to Make a Garden Seed Storage Box:
- White Tin Box (or any box will do)
- Mod Podge
- Fabric
- Alphabet Stickers
- Items to Embellish (ribbon, garden-themed charms, etc)
Tools Needed:
- Scissors
- Foam Brush
(NOTE: I have had a hard time finding these tin boxes online and it seems finding them at the craft store is hit or miss. If you want to make this craft but can’t find a metal tin, you can use any other box. I did find paper mache recipe boxes (affiliate link) and unfinished wooden recipe boxes
(affiliate link) on Amazon.)
This garden seed box is very easy to make using decoupage techniques. Please use this tutorial only as a guide… Let your creativity help you decide what your seed storage box will look like.
Start off by cutting all of the fabric pieces that you will need to cover the box. I cut a large piece to wrap around the sides of the box, a piece for the top, and a thin piece to attached around the side of the lid. You will want to cut the pieces that will wrap around the box and lid a little longer so you can overlap them.
Use the foam brush to spread Mod Podge all over the side of your tin box. carefully place the fabric piece on the Mod Podge. Overlap the ends on the back of the box. Smooth it out and make sure there are no bubbles. Now, cover the fabric on the box with a layer of Mod Podge.
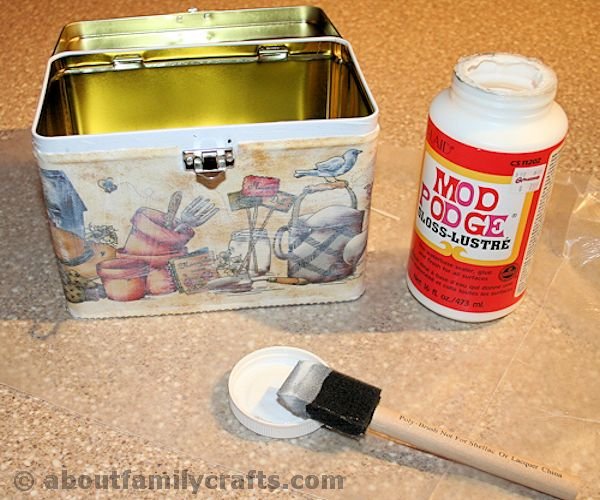
Cover the top of the box with fabric the same way you did the side. Start out by spreading the Mod Podge all over the lid. Set the fabric in place and then use the foam brush to spread a layer of Mod Podge over it. Do the same for the thin strip on the side of the lid.
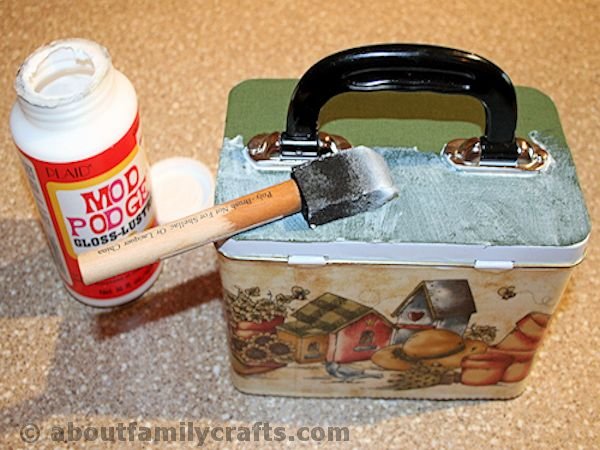
Let the Mod Podge dry completely and then you can add some fun finishing touches. I used a bit more fabric and some alphabet stickers from my scrapbooking supplies to spell out “Garden Seeds” on top of the box. I attached and sealed these using the Mod Podge.
I cut several pieces of brown ribbon and tied them around the box’s handle. I also found some adorable miniature vegetables that I glued on the lid.
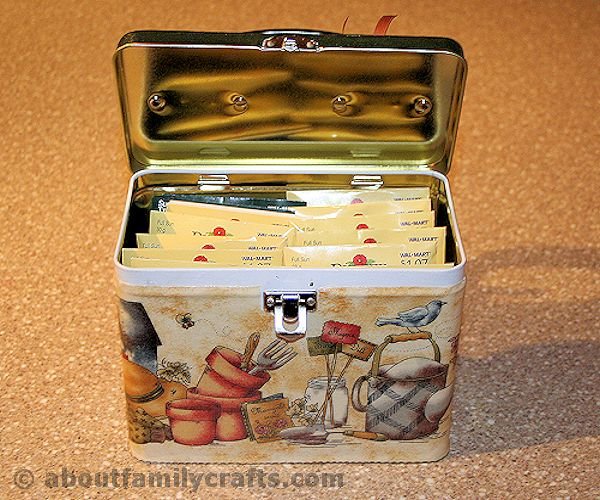
Once I was satisfied by how my garden seed box looked, and all of the glue was dry, I filled it with my packets of flower and vegetable seeds. Now, if only I could get out into the garden…
Disclosure: As noted above, this post contains affiliate links. See my disclosure policy for details.
Cute idea and very useful! We just began a small garden so this would be perfect.
That might be the Fathers’s day present I’ve been looking for, thanks for the great idea!